

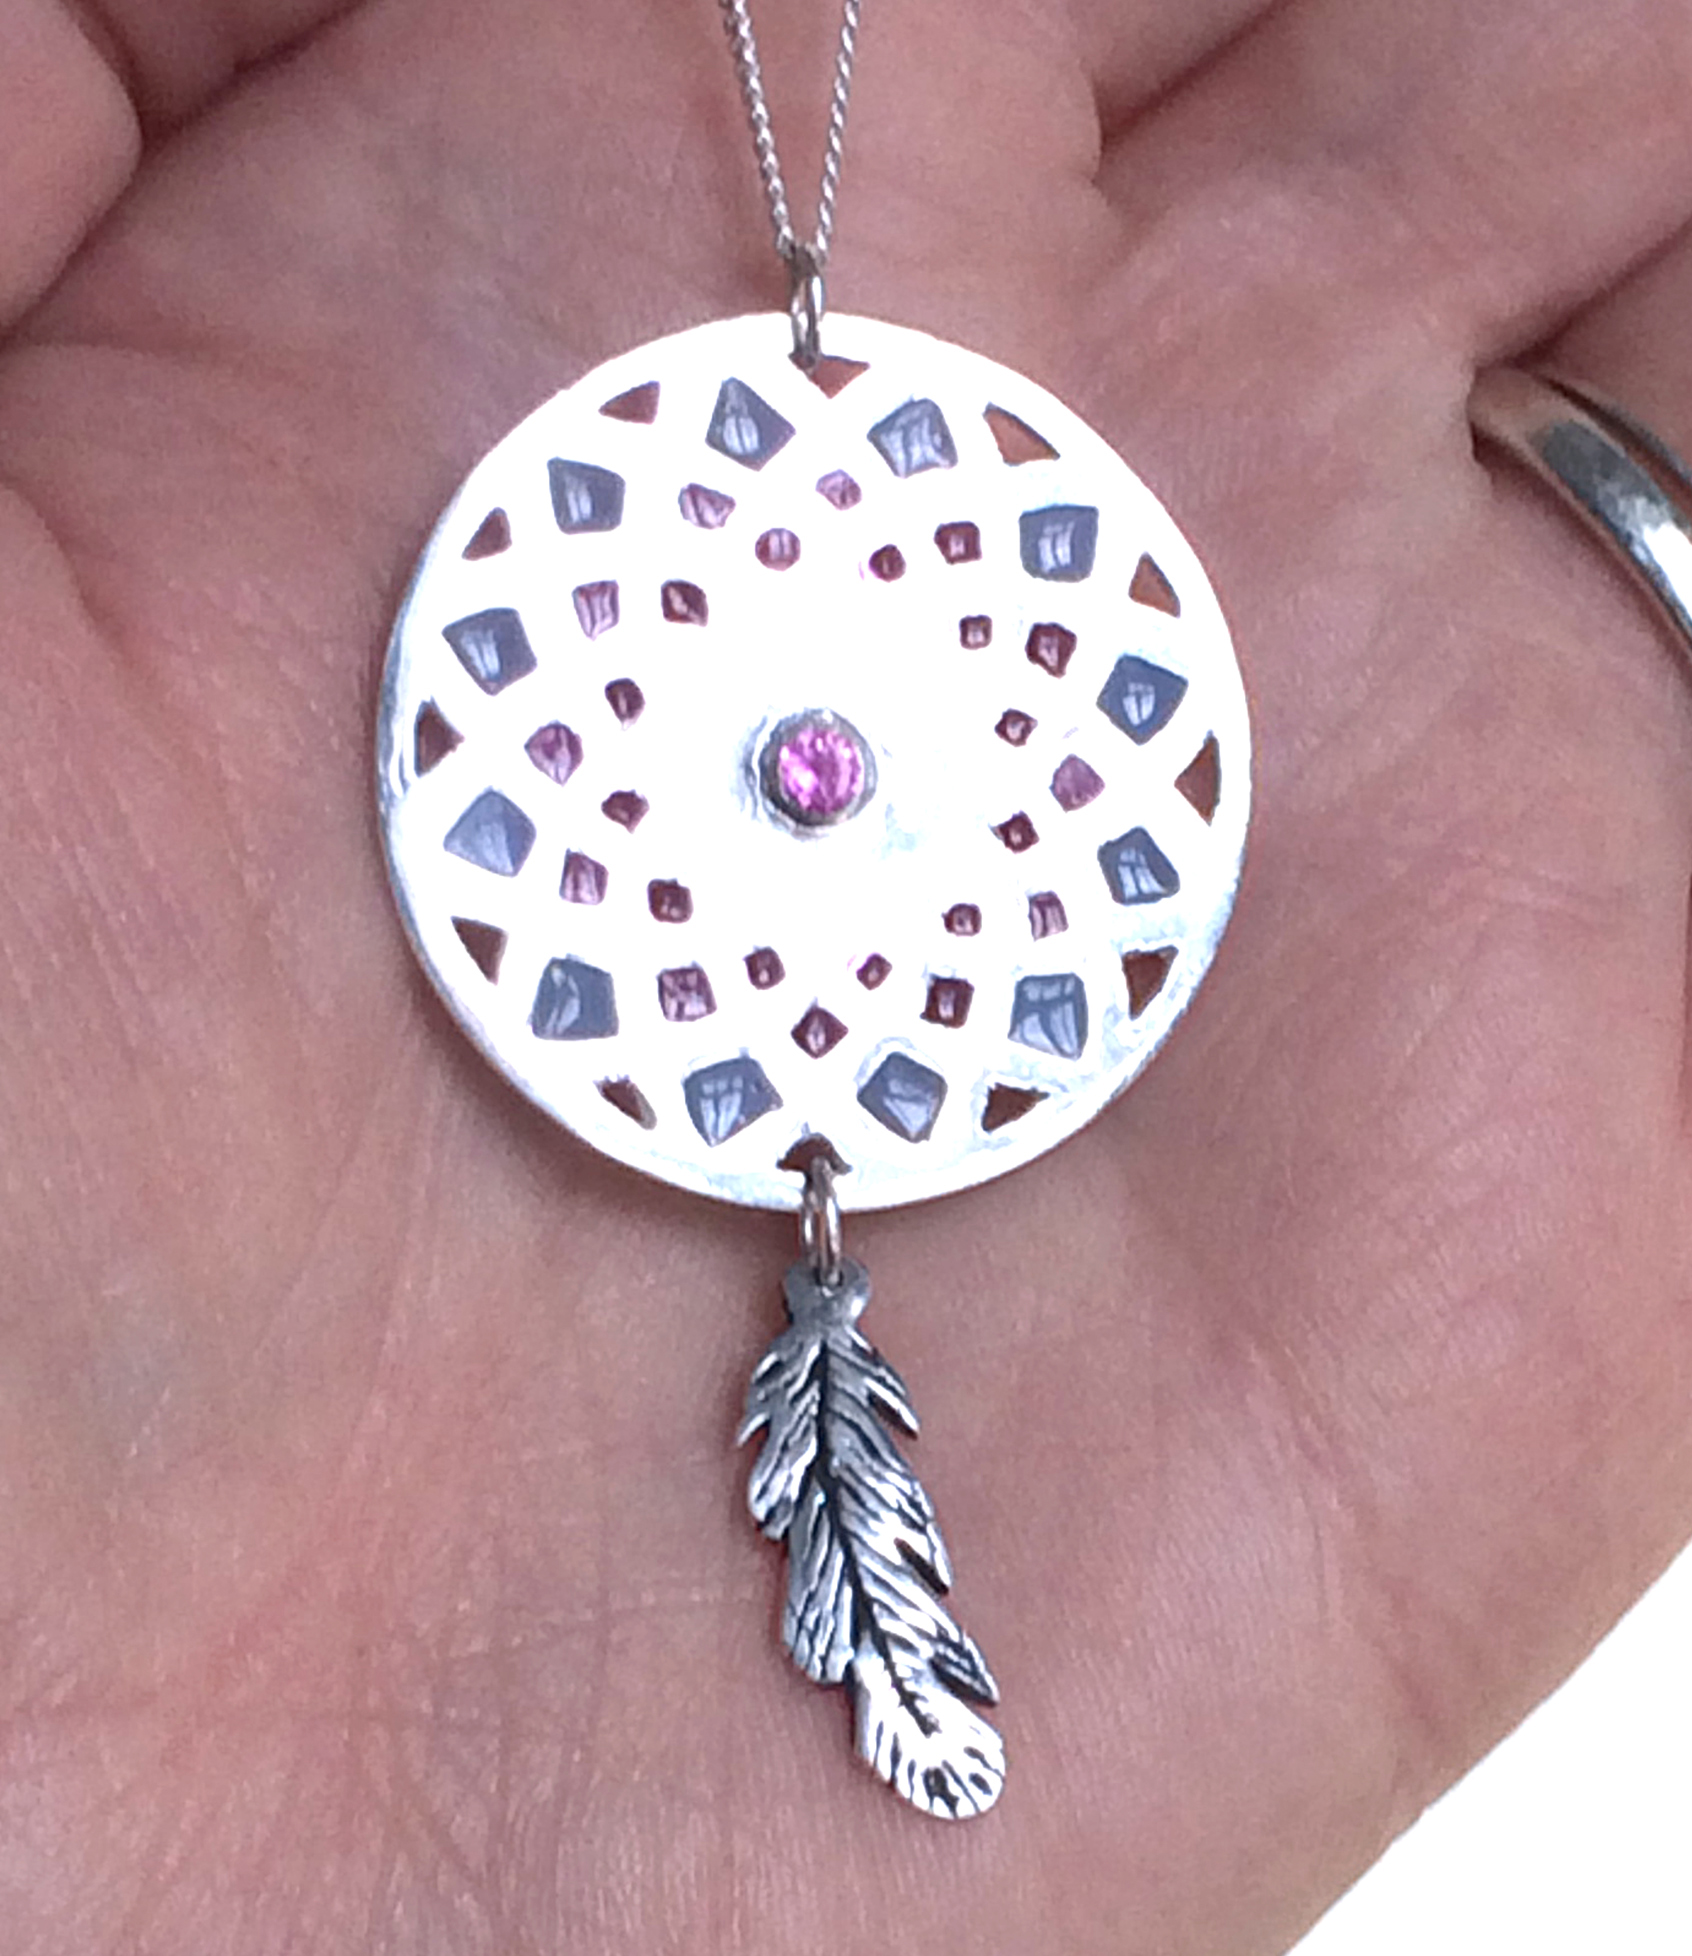
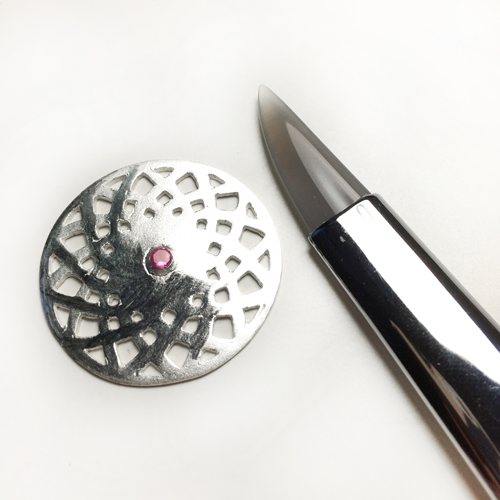
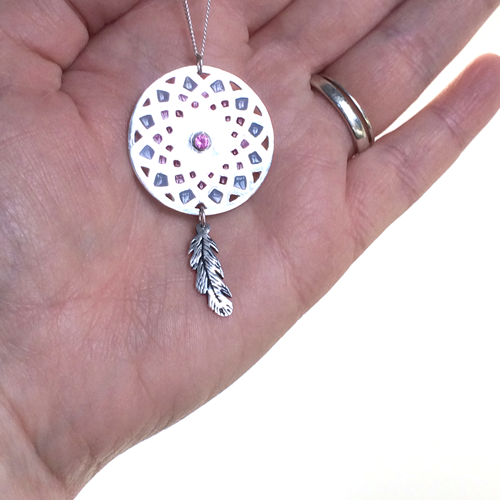
Dream
Catcher Pendant Project Tutorial
Project Level: Intermediate
Materials List:
* A274Z-22 – Art Clay Silver 20gm
* A285 - Art Clay Silver Paste Type - 10gm
* AG-4010 – UV Crystal Resin
* R169 - UV Resin Colour - Rose
* R175
- UV Resin Colour - Opaque Pastel Blue
* LCGPIR3 - Lab Created Gemstone – Pink (3mm)
* K0002 - Sterling Silver Jump Ring Medium - Pack of
10
* Silver Chain
Tools Used:
* Glue
Stick
* Cutting
Mat
* TL03482 - Modelling Knife
* CRV-103 - Ultra Clay Pick
Needle Tool
* WKS103 - TUFF Non-Stick
Cards
* SPACSET - Spacer Set
* SKU21201 - Badger Balm or Olive oil
* 3522TL-H - Clear Acrylic
Roller
* TL02558 - Sable Paint
Brush No.00
* SPS-3 - Sanding Pad Set
* TL10358 - Needle File Set
* PIN-224.00 - Swivel Pin Vice
* F134 - Drill Bit Set -
Set of 4
* Either: F018B - Gas Hob Firing Mesh (if firing on the hob) Or:
KCTORCHDEL - Handheld Gas
Torch Deluxe Large Flame and F081 - Fibre
Brick
* TS696669 - Cross-Action Tweezer Set -
2 Piece
* DG025 - Brass Brush - Jewellery Quality - Medium
* 337306 - 3M Polishing Paper - Light
Green - 1 Micron
* 337303 - 3M Polishing Paper - Blue -
9 Micron
* 337301 - 3M Polishing Paper - Dark
Green - 30 Micron
* TT020 - Town Talk Silver Polishing Cloth Small
* F038 -Liver of Sulphur
- Small - 6ml or Patina Solution
* UVLIGHTW
- Professional UV Light Box - White
* ER706 - Ergo Flat Nose Box-Joint Pliers
* Clear Acrylic Lid (from cocktail sticks for example)
Instructions:
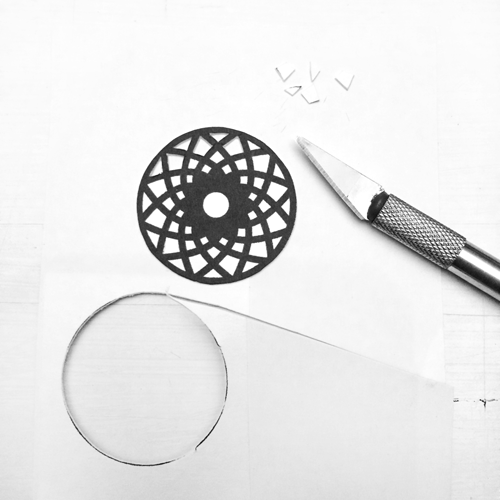
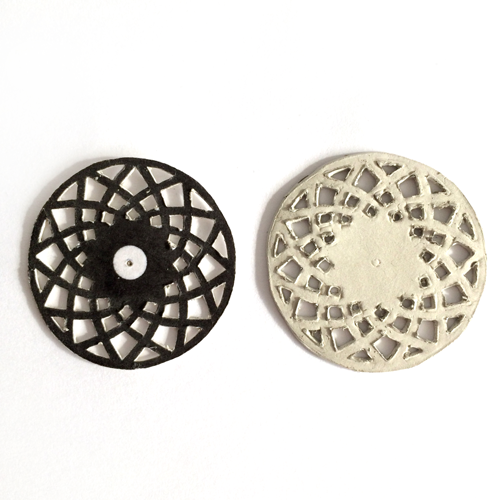
Step 1: Either design your own
Dreamcatcher shape or print out from my design created in Illustrator,
included. Glue the paper print out onto the non-shiny side of the card. On a
cutting mat use a Modelling Knife to carefully cut out the shapes, you can use
scissors to cut out the circle.

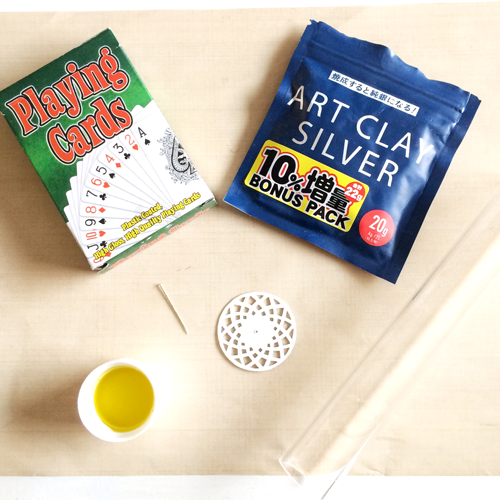
Step 2: Put Badger Balm or Olive Oil onto the non-stick
card or playing card and the roller, then roll out the clay 4 cards thick (1
mm). Olive Oil works really well on the base sheet when cutting out shapes as
the clay releases more easily. You can either use spacer bars or playing cards.
Remember: if you are rolling out onto a card then put
two 5 card piles at each side of the clay to account for the one under the
clay.
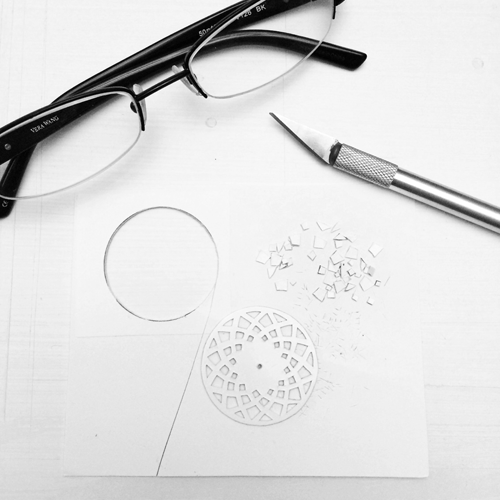
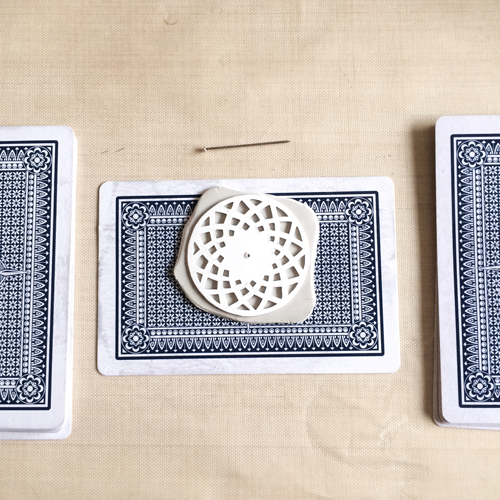
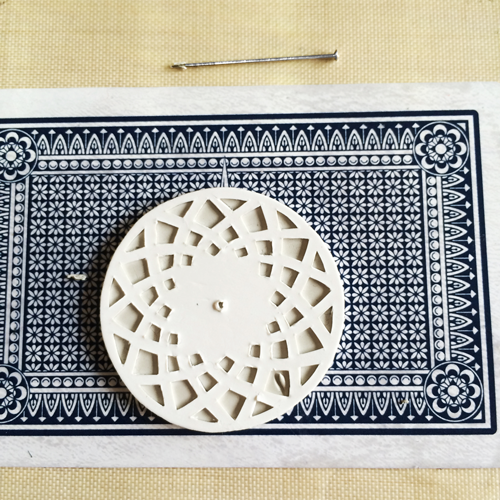
Step 3: Put some Badger Balm or Olive Oil onto the shiny side of the Dreamcatcher card template before you place it onto the clay. Make a pin hole in the centre of the card and mark this in the clay. Use a clay pick or dressmaker’s pin to cut out the shapes. If the template is difficult to remove at this stage then leave the piece to dry and carefully take off the card with a Modelling Knife
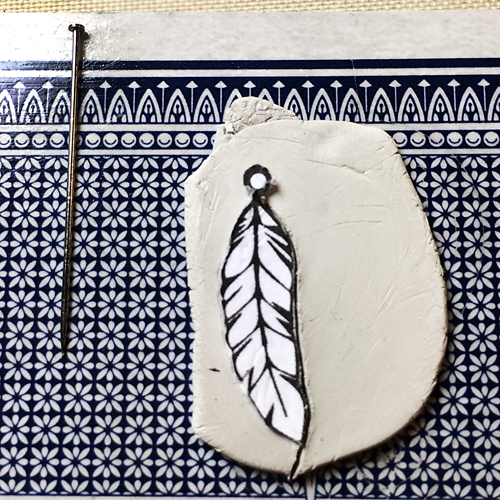
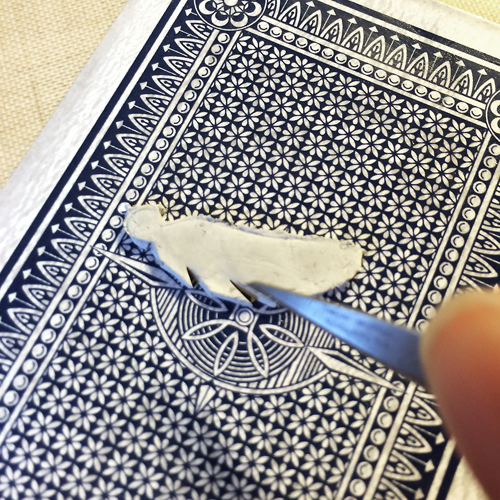
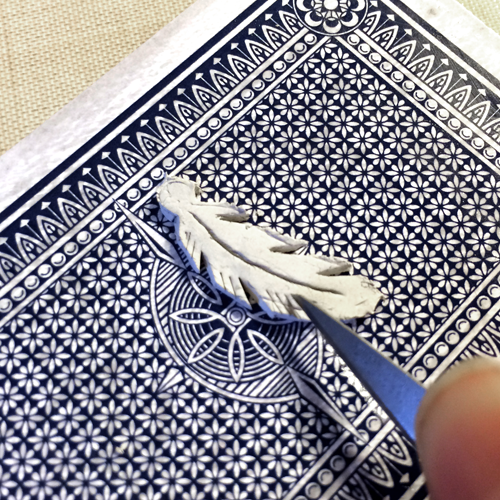
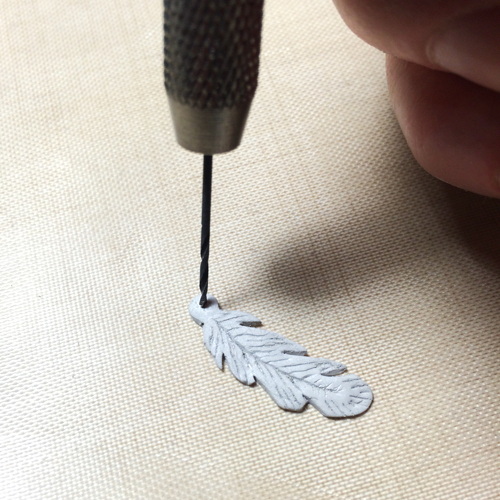
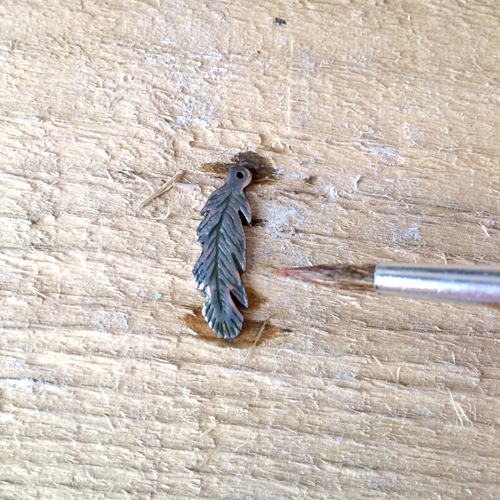
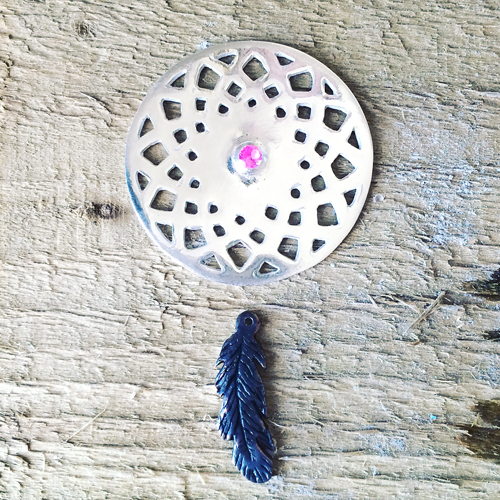
Step 4: The feather shape can be cut out at the same time, again you can design your own feather or use the template provided (glue onto card, cut out and trace round with a pick tool or dressmaker’s pin). Whilst the clay is wet use the pin and Hobby Knife to create the feather texture. Leave to dry, once dry carefully drill a hole in the top loop using the Swivel Pin Vice and smallest drill bit.
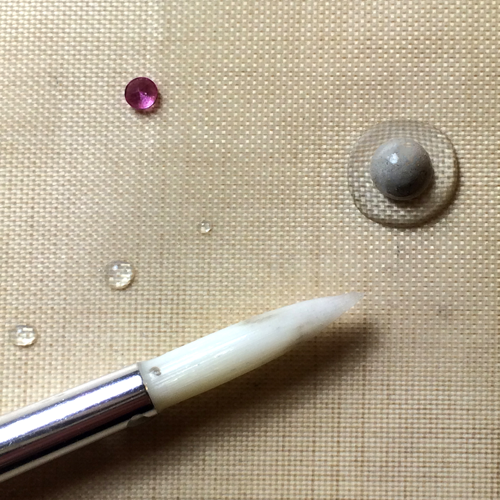
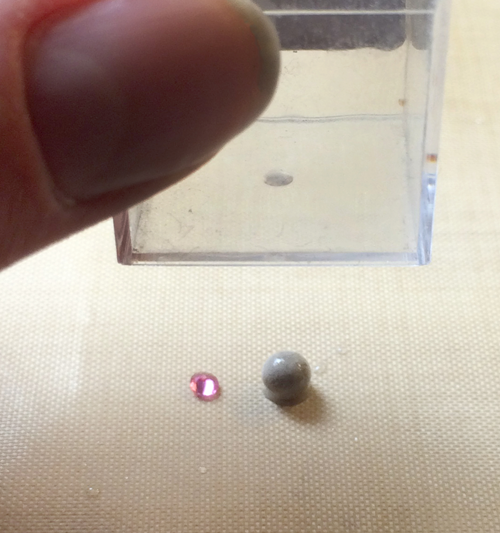
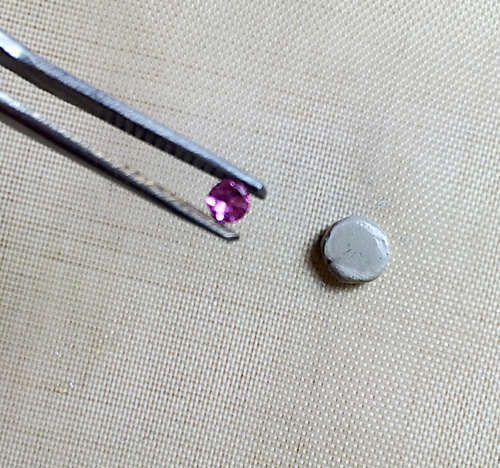
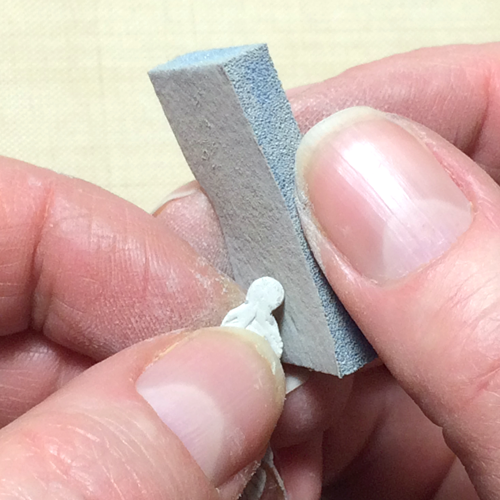
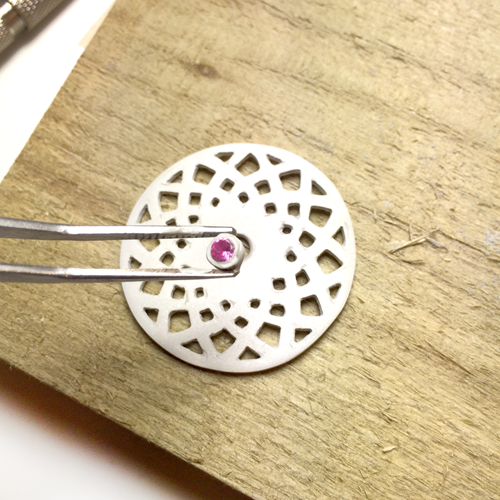
Step 5: To make the setting for the stone roll a
ball of clay a little bigger than the stone. Put the ball on a non-stick
surface (non-stick card or Teflon mat) and using a paintbrush drop a little
water on it then leave for a couple of minutes. Place the stone next to the
ball and taking a clear acrylic lid, (e.g. a cocktail stick lid) slowly press
the top of the ball by pressing and lifting until you can feel the lid touching
the stone. Make a small indent in the centre of the flattened ball using the
Pick tool or a cocktail stick then pick up the stone with tweezers and
carefully place it in the centre. Again use the acrylic lid to slowly press the
stone down until only the crown (top) is visible, then leave to dry. When dry
use the sanding pads to create a neat circle surrounding the stone.
Remember: As long as your setting is big enough it
doesn’t need to be perfect at this stage as you can sand it to the correct
shape when dry. Try to keep the setting on a flat surface when sanding to avoid
it being dropped and damaged.
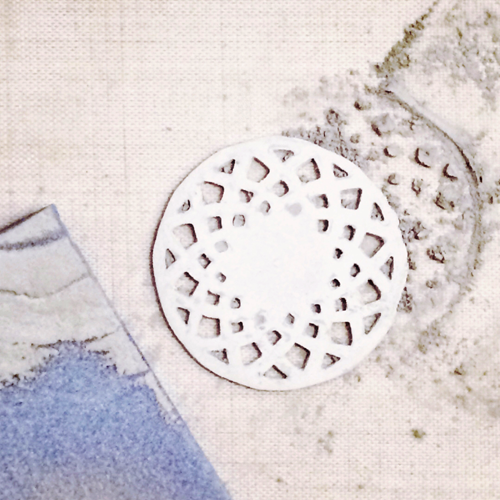
Step 6: Once the Dreamcatcher and feather are dry
use sanding pads to carefully clean and smooth them. A rounded needle file can
be used to tidy up the cut out shapes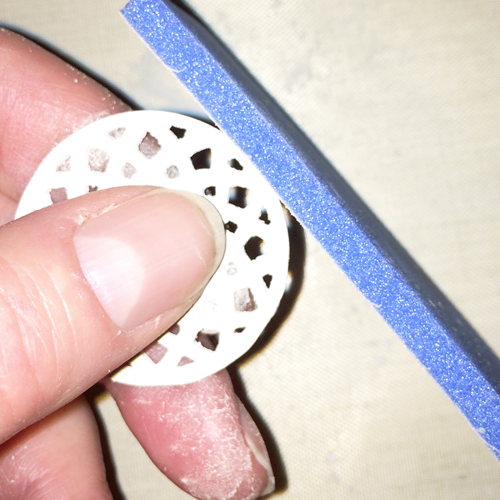
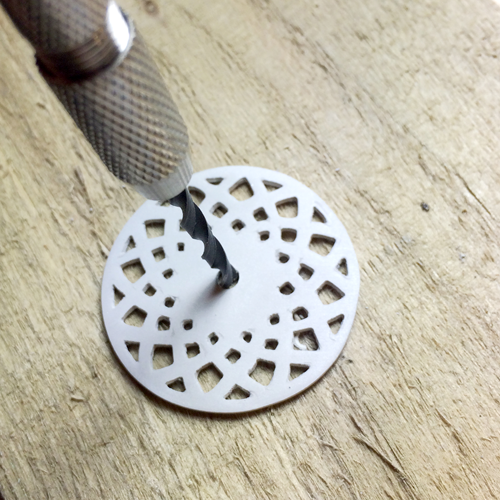
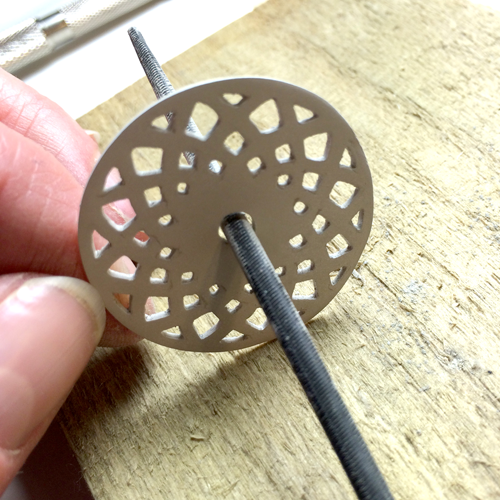
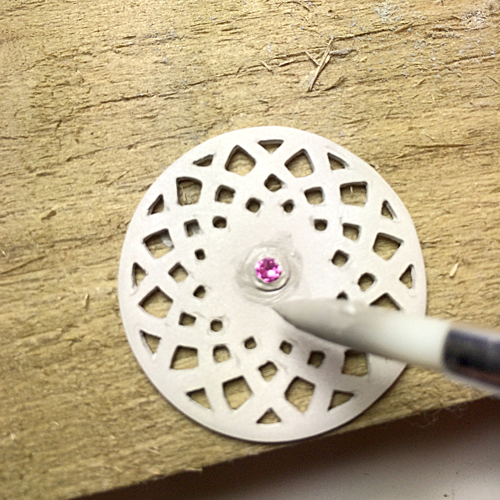
Step 7: Using the swivel pin vice and the largest
drill bit make a hole in the centre of the Dreamcatcher. You can use the round
needle file to make it bigger if needed. Match the size of the setting to the
hole by gradually sanding one or the other. When you have a perfect fit, use Art
Clay Silver Paste to fix the setting in place then leave to dry.
Remember: It is possible to make your own paste using
the silver clay powder collected after sanding, make sure the consistency is
quite thick.
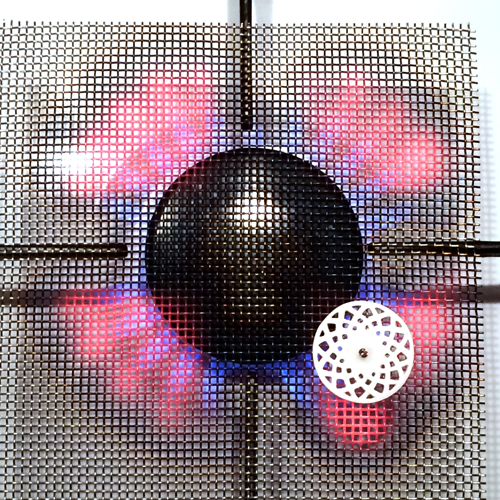
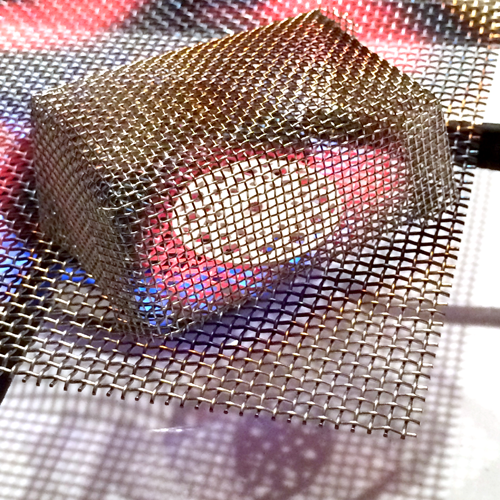
Step 8: When all your pieces are completely dry you
can fire them on a hob for 10 minutes using Firing Mesh or Torch fire for at
least 5 minutes. To fire on the hob place the mesh over one of the rings and
heat, make a mental note of the hot red patches, switch off and then place your
pieces in these hot spots. When you have finished firing, turn off the hob and
leave to cool for 15 minutes. Remove with tweezers and place in a bowl of
water. If they have fired correctly there should be an 8-10% shrinkage from the
original size (compare with the templates).
Remember: Cover your pieces with the protective mesh
to avoid accidents if they explode. This can sometimes happen if there is
moisture or air bubbles inside.
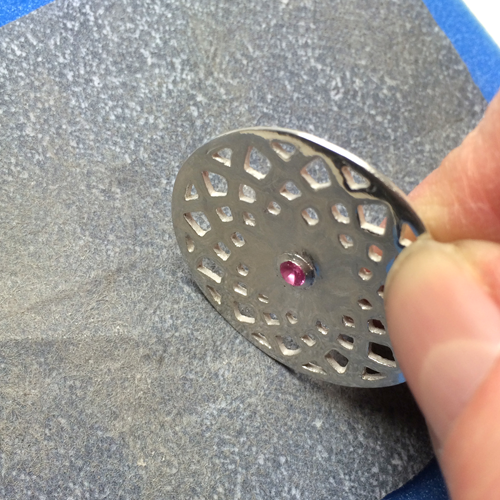
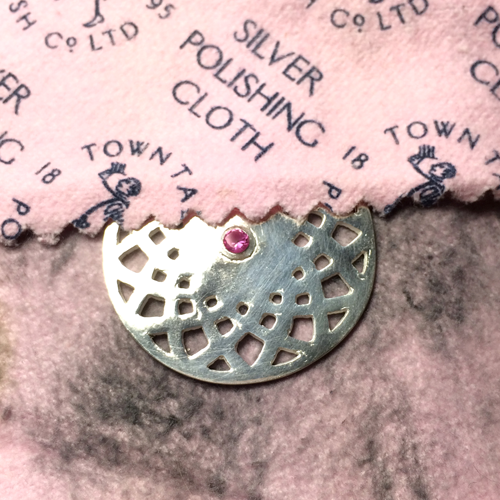
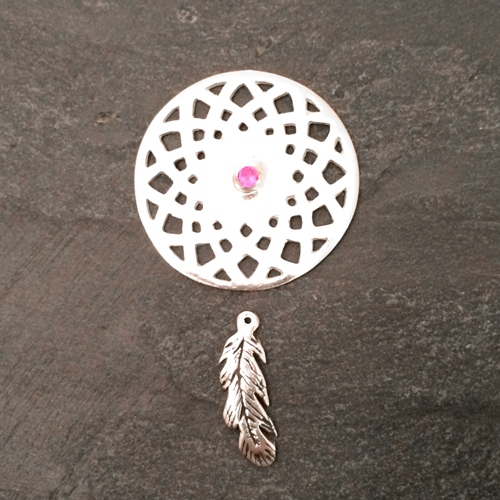
Step 9: Brush your pieces with a soft brass brush to give an initial shine. If you have an agate burnisher then you can use it at this stage to make the piece shiny, this makes the process quicker but isn’t essential. Finish off with the polishing papers starting with 30 micron and gradually go through the grades to 1 micron so your piece has a mirror finish. Finally give it a wipe with a polishing cloth for a final shine and to help with anti-tarnish

Step 10: To emphasise the lines in the feather use
Liver of Sulphur or Patina solution. Use a brush to paint the patina straight
on to the silver or dilute the Liver of Sulphur and dip until you have the
desired effect. Leave the feather to dry for a few hours then polish to reveal
the texture underneath.
Remember: Use these chemicals in a well ventilated
area and keep out of reach of children and pets
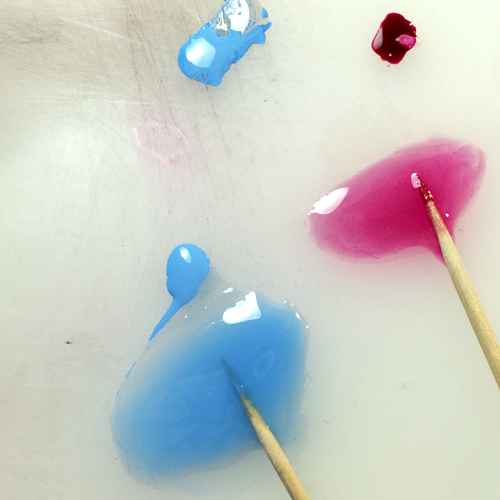
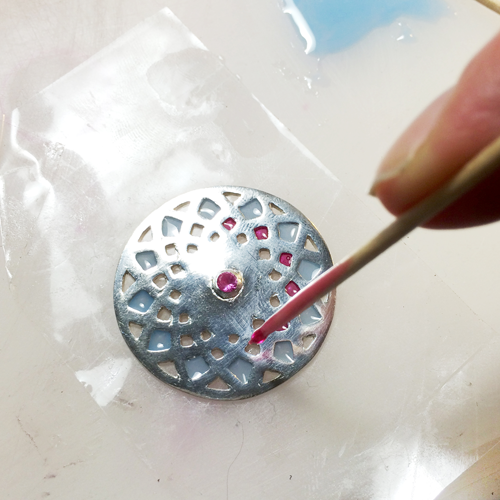
Step 11: To add colour to your Dreamcatcher you can
use UV Crystal Resin. Firstly use 50mm packaging tape to seal the back of your
Dreamcatcher. Then pour out 2 small
pools of clear resin and a very small blob of each colour. Using a cocktail
stick gradually add colour to the resin mixing a small dab at a time until you
get the required tone. When you are happy with the colour use the cocktail
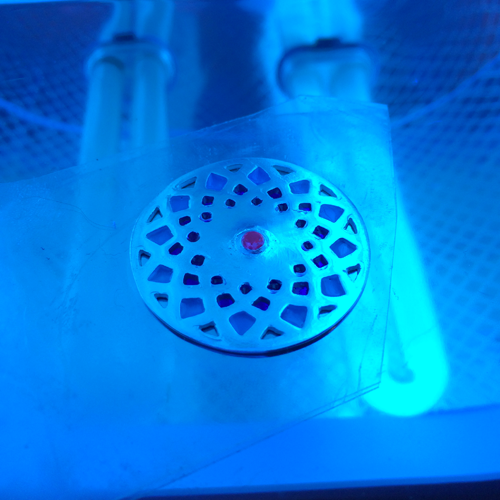
stick to drop tiny amounts of resin into the Dreamcatcher. Place in the UV light box for the recommended
amount of time (20 minutes in a small light box).
Remember: Don’t overfill the spaces as the resin
looks more transparent and jewel-like when not too thick. Give yourself plenty
of time for this stage as it can be quite fiddly. If you go wrong use a cloth
to wipe off the resin and start again, you may have to polish the silver again
at the end if some residue remains.
Step 12: Remove any spills with polishing paper then using a polishing cloth give your Dreamcatcher a final shine. You are ready to assemble your piece of jewellery using jump rings, pliers and silver chain.
See more of Emily Bower's work at www.retroviolet.co.uk
