


Product Description
NEW! 'The Bangle Maker - Round' by Clément Marquaire from CMMC Tools – exclusive to Metal Clay Ltd in the UK!
Discover an innovative way to create seamless bangles! Available in three different sizes, ranging from 63.5mm to 84.5mm. If you've attended a ring making class with Clément or tried the wonderful ring maker , this tool works in the same way, just in a much larger size.
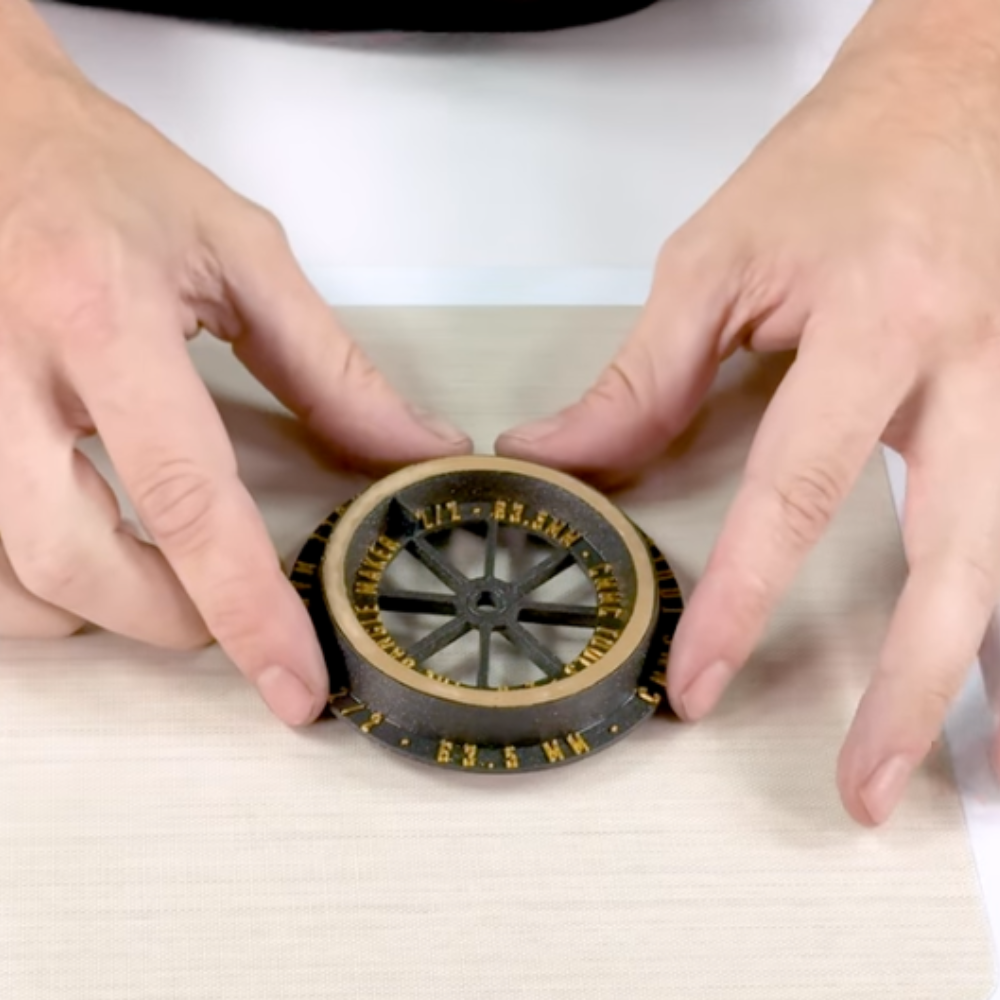
These bangle sets come in three sizes: small, medium, or large. The small and large sets include two cutters each, while the medium set includes three cutters. Each bangle maker is composed of two parts: the inner cutter and the outer cutter, along with a moving part inside, which Clément calls the “pusher.” You can use this pusher to push your clay out when it’s dry. By alternating the inner cutters, you can create bangles of different thicknesses. Each set comes in its own round beautiful box.
Sizes:
- Small set: 2/2–63.5 mm & 2/4–67 mm
-
Medium set: 2/6–70.6 mm, 2/8–74mm & 2/10–77.5 mm
-
Large set: 2/12–81 mm & 2/14–84.5 mm
How to Use:
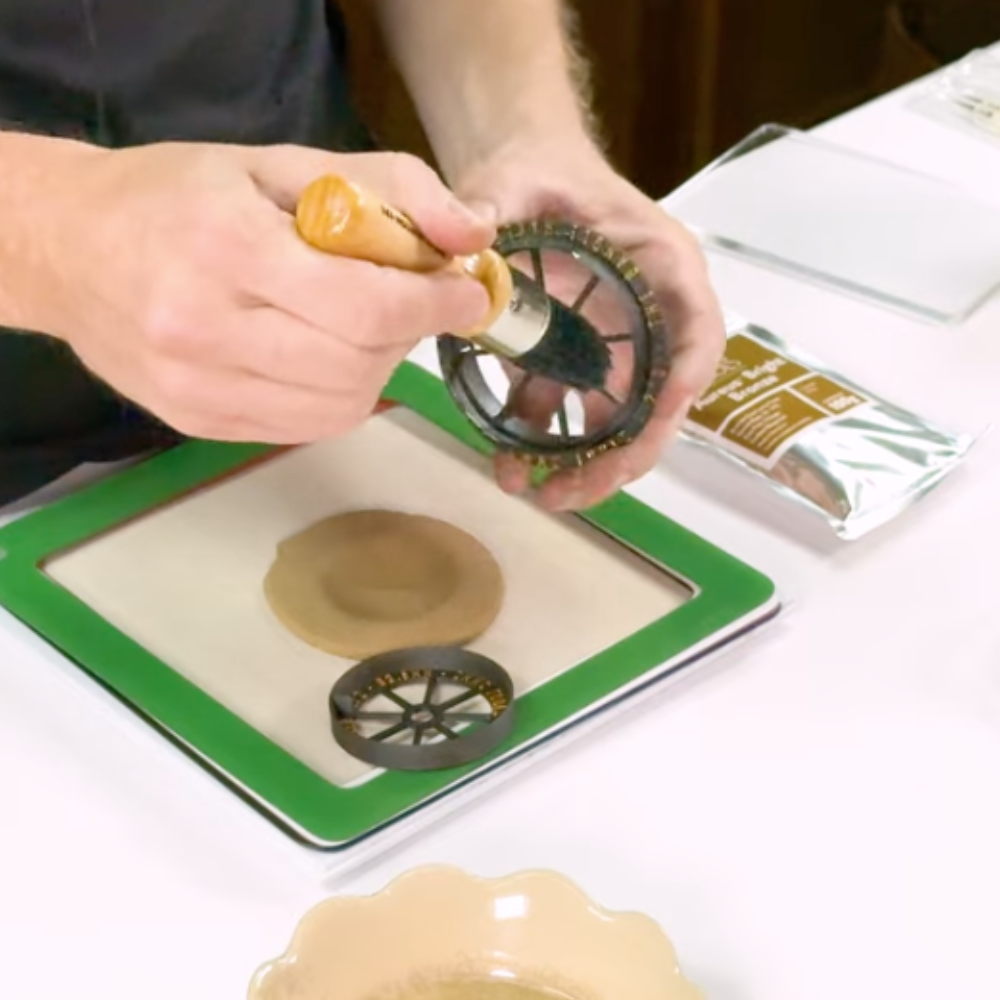
- Prepare your cutter: Oil your bangle cutter with a non-stick solution—Clément uses olive oil. Place the cutters back together, making sure they are properly aligned.
- Prepare the clay: Place fresh clay on a non-stick surface and press it down with a scale roller.
- Roll the clay: Roll your clay with thickness guides and a roller. Make sure you have enough clay to cover the size of the bangle and that it is rolled out to a consistent thickness.
- Cut the bangle: Press your oiled cutter firmly into the clay, ensuring all parts, including the inside, are pressed down.
- Remove excess clay: Flip your work surface and remove any excess clay from both the outside and inside.
- Dry the bangle: Place the bangle maker in a dehydrator for about an hour, or let it air dry for a longer period.
- Release the bangle: Place the maker down with the writing facing upwards and push the bangle out. Place two fingers on the outer edge and press with one finger in the middle until the bangle pops out. If it still feels wet, return it to the dehydrator to dry fully.
- Add texture (optional): Once the bangle is fully dry, you can add texture at this stage.
- Fire the bangle: Fire the bangle according to your preferred clay firing guide.
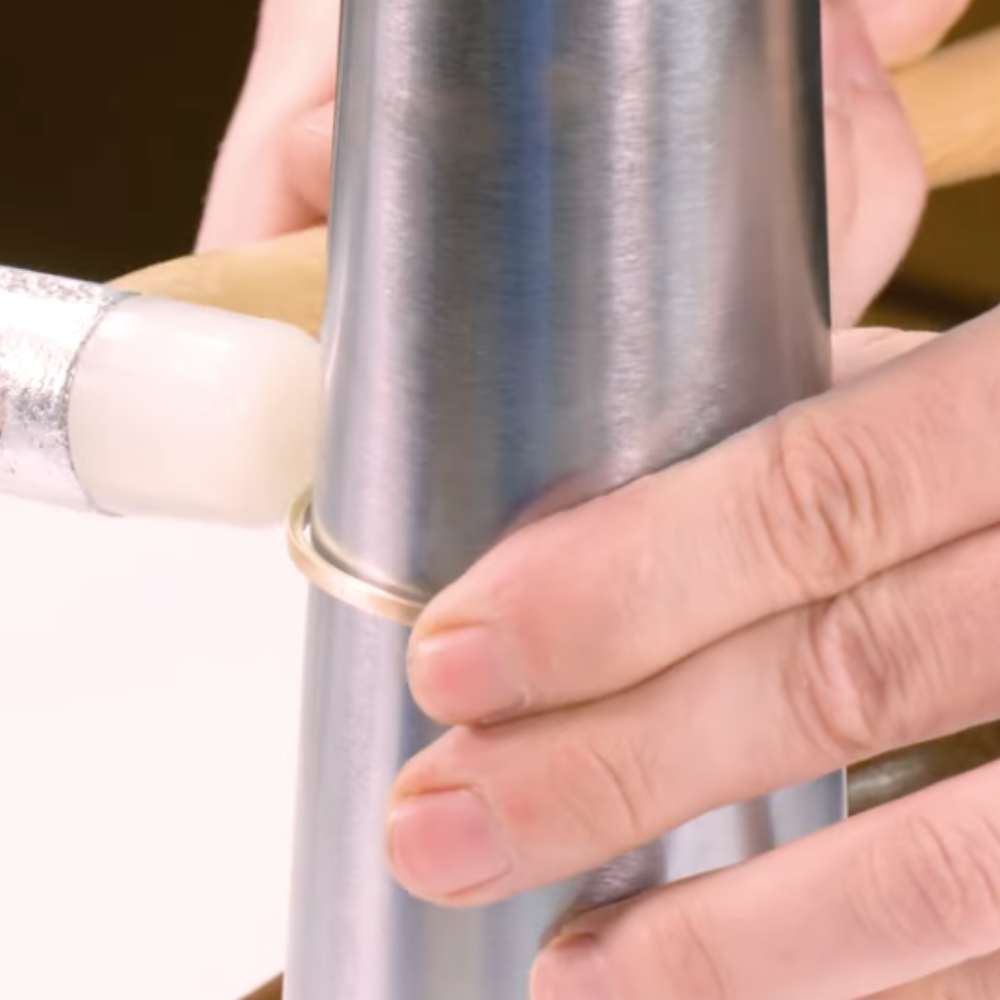
- Shape the bangle: If the bangle changes shape slightly during firing, gently press and rotate it by hand until it is round. Alternatively, use a mandrel with a rawhide or nylon hammer to gently tap and rotate the bangle until it is perfectly round. Repeat on both sides. This not only shapes the bangle but also hardens the metal, adding strength. You can also add texture with texture hammers at this stage, keeping in mind that excessive hammering may slightly increase the size of your bangle.
- To Add Texture Using a Texture Mat:
- Apply a non-stick solution to your texture mat.
- Roll a clay snake or coil, ensuring a consistent thickness (a snake roller or clay extruder works well).
- Place the coil on the mat and roll it out to a thin, even thickness.
- Leave the rolled-out clay on the mat and lightly apply water to the flat side.
- Add water to your bangle to make it sticky.
- Press the bangle firmly into the rolled-out clay(keeping it on the texture) until the entire surface is covered in texture.
- Watch Clément’s tutorial made with Cool Tools to learn more.
- Images courtesy of Cool Tools.


