
Art Clay metal clay is easy to use, fun, inspiring and non-toxic. As a beginner you can use ‘tools’ you can find in your kitchen, office or DIY toolbox. Art Clay looks and feels much like ordinary sculpting or porcelain clay. What makes Art Clay so fantastic is that it consists of extremely fine particles or pure metal (silver or gold), almost like dust, mixed up with a non-toxic organic binder. The binder burns out during firing, leaving you with a pure metal piece.
Art Clay comes in several forms:
1) Art Clay Silver - New Formula
Aida has picked the best parts from their three older most popular clays - easy moulding from the Original, slow drying from the Slow Dry, and a low firing temperature from the 650 range and came up with the new ultimate formula.
We think this might just be the ideal clay! It is a gorgeous creamy clay, which is lovely to work with. It feels a little like PMC clay, but with no stickiness. This moist clay dries up to four times slower than the other clay types. This allows you to work with it for longer, without it cracking. This clay works very well for making fingerprint jewellery. The clay must be completely dried before firing. It is recommended that you leave your piece to dry in room temperature for 24 hours prior to firing. At this low temperature it can be fired with sterling silver, dichroic glass and some natural stones. For extra strength most metal clay artists fire their pieces for longer, and at the highest possible temperature. Read more about this on the firing blog page, which will be posted soon.
Why is the new formula so wonderful?!
- It has a great workability and a longer working time (even longer than the previous Slow Dry!)
- It retains and accepts moisture easily, which means it is easier to keep supple and much easier to reconstitute if it dries.
- It is easy to carve and files in the dry stage.
- Fire with kiln, torch, or gas stove. Using a kiln the recommended time and temperatures are 30 minutes at 650°C on a continuum to only 5 minutes at 800°C.
- Will Shrink around 8-9%.
2) Art Clay Silver - New Formula Paste
This thick cream-like paste version of the New Formula Clay is made for repairs, like filling in cracks and ‘gluing’ broken pieces back together. You also use it to stick unfired pieces together, so you can build up large dimensional shapes by making, drying and finishing each piece individually - when they’re all finished, you use the paste to stick them all together, which creates one solid piece after firing. It is a bit like ceramic slip. The paste can also be used to cover leaves, paper, cereals, and similar things that will burn, to make a fine silver replica. If the paste is very thick, use a little water to thin it - only add a drop at a time, and stir slowly.
3) Art Clay Silver - New Formula Syringe
This softer version of the clay comes in a syringe to make fine lines, dots and other decorations. Its thicker than paste, and it also has a slightly different binder, which ensures it will hold its shape when extruded. There are different sized tips (nozzles) to choose from, range from very thin so you do very delicate drawings, medium sized which makes perfect little donuts which you can set stones in, up to thick which is perfect for building up thick lines - ideal if you want to make a pieces from only syringe. It can be applied to a core shape which burns off during firing, creating a filigree or lace-like hollow form. It is great for surrounding and setting stones in the clay, and it is ideal for repairs as you can be very precise with where you add the syringe line, using a fine tip. Shrinkage is again 8-9%.
4) Art Clay Silver - Overlay Paste
This is the clay in a water based paste form, which has been designed to use on glazed porcelain, ceramic and glass. After firing (temperature ranging from 650°C to 800°C), it will bond to the surface and won’t come off.
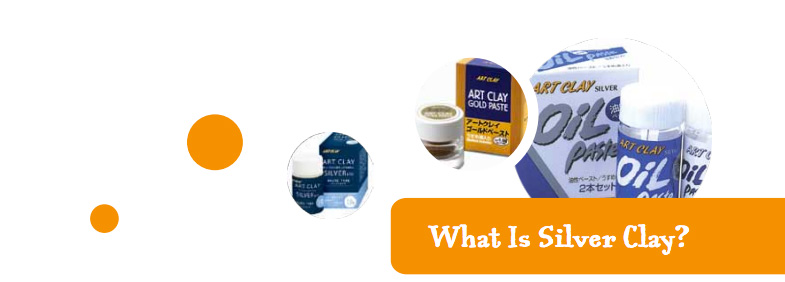
5) Art Clay Silver - Oil Paste
This oil based paste attaches to metal, so is used for repairing and fixing already fired pieces together, or for adding sterling or fine silver components to your silver clay pieces. It gives you a stronger bond than if you used the normal Paste. It comes with a thinning liquid, to use if the paste dries up.
The paper has a different consistency to the clays, it is completely dry and sliiiightly rubbery. It is thin and flexible, and can be plaited, origami folded, punched, cut, or layered to create thicker sheets. Cut out shapes with a craft paper punch and decorate your clay pieces. Appliqué pieces (where you put Art Clay paper on top of Art Clay clay) should ideally dry in room temperature or a low temperature dryer to avoid cracking. The paper on its own does not need to dry before firing, it can go straight in the kiln. Don’t add any water to the paper. If you get any cracks, repair these after firing with Oil Paste (adding water or normal paste will make the paper difficult to work with, and too much water will make it disintegrate). To apply paper shapes to a base clay piece, apply a small amount of thinned Art Clay Paste to the clay piece and apply the shape. Shrinks about 9-10% (as the shrinkage than the clay, you can get some interesting doming effects if you add a lot if paper to clay).
This is the gold version of the clay, which can be worked just like the silver clay. Fires for 1 hour at 990°C. Shrinks 15%.
8) Art Clay Gold Paste & Accent Gold For Silver
These fantastic products are a economical and easy alternative to using the gold clay. It is simply pure gold in a liquid form, which you paint onto your fired piece, let dry, fire again, and burnish - and you have 22 or 24 carat fold accents! Super easy,and beautiful!
Petra’s favourite base metal clay! A nice smooth clay to work with, with a gorgeous copper colour once fired. It is very easy to work with, but it comes out of the packet quite hard, and wants a little massage (wrapped in cling film) before you use it to soften it a little. It does oxidise once open, so try to use the clay as soon as possible after opening. Vacuum wrapping is recommended. The nice thing with this clay is that it can be fired with a torch, so you don’t need access to a kiln. Once fired you’re left with 100% copper. Use separate (or very carefully cleaned!) tools as the copper can contaminate your silver clay. Shrinks about 10%.
Handling
As all the clay forms contains water they will dry out if handles too much, for too long, under a hot lamp, in a warm climate, in a draft or placed on the wrong surface (use acrylic, glass, teflon, coated playing cards - something which won’t act as a blotting paper or stick to the clay). See the Tools page for more information.
You can minimise the drying by making sure you are prepared, your tools are laid out, and you have an idea in mind before you unwrap the clay. Cut off a small piece only and put the rest of the clay back in the wrap. Keep a little piece of damp fabric or cling film which you can cover your clay with if you need to leave it for a short while.
Spread a little Badger Balm, Slik, our own very own homemade Non-Stick Balm (which comes in Lavender, Lemon, Peppermint & Orange scents!) or some olive oil over your hands before you start - just a thin coat. This will stop the silver clay from sticking to your fingers and will also coat the clay which seals it a little from drying out. Don’t use too much though, or you clay will be sliding all over the place. The best way to work with the clay is on a teflon coated baking paper. I often cover the clay with a clean sheet before using the roller.
Keep a little dish of water next to you, every now and then dip the tip of your finger (or use a small soft brush) and gently brush over the surface of your clay as you are working with it. This smooths out the surface, and helps to keep it pliable and moist. If you notice small cracks, it is definitely time to add a little moisture.
You can re-moisten dry metal clay with a drop or two of water, knead it in, wrap up carefully in cling film and put back in the resealable pouch. When you take it out a day later it should be as new. (I have noticed that some brands of cling film are better than others, so in case you have a very thin film, double it up). Still dry? Well, add a little more water, knead and repeat the process. If it is too wet, or a bit slimy, you have added too much water - dab the surface dry with fabric or kitchen paper (make sure it is good quality kitchen paper which won’t leave your clay full of paper pieces), roll it up in your hand, knead it a bit, and then put it back on the shelf for another day. The clay feels the nicest if it is used within a year of purchase, but it won’t go off and doesn’t really have a use-by date. Even hard clay can be re-moistened with a bit of work. Poke a lot of holes in it with a sharp too and spray with water, the holes help the water to go into the clay. Wrap up carefully, keep adding water, poking holes and massaging it every now and then and soon it will be back to normal! When you store your clay, add a little sheet of wet fabric or tissue in the pouch to keep the moisture sealed in.
Oh - one thing. Don’t use aluminium tools or kitchen aluminium foil with the clay! The aluminium contaminates the clay and will cause loads of problems - some only noticeable after firing.
Drying
The finished piece needs to be completely dry before firing to avoid any damage. Air dry for a few hours/overnight in a warm spot (depending on size and thickness), or use a hotplate (food warming plate), hair dryer, dehydrator, kitchen oven set at a low temperature, or a heat gun to speed it up.
Be careful when using forced heat, if it gets too hot the binder might start burning off, and this can distort the shape. And, with a thick piece, the forced drying can dry the surface which will lock the moisture inside the clay. Drying the piece slowly in a warm environment with circulating air is definitely the best option if you have the time. Remember to also turn the piece to check the back has dried.
When the clay is dry and leather hard, use files and abrasive sponges to adjust the shape and smooth the piece. Make sure that all little burrs or nicks are removed, remember they’ll turn into metal when fired - not very comfortable. It is worth spending some time on finishing your piece prior to firing, as this will make and enormous difference to the finished look.
Firing
There will be more info on this topic on the Firing blog page (You can also find more info on the Learn More page). You can use a kiln, gas hob, or a small handheld butane torch. A flat thin piece can easily be torch fired, while a larger piece or shapes based on a core material should ideally be fired in a kiln.
Note
Sterling silver (925) contains copper (7.5%) which makes it a stronger metal than fine silver. Fine silver, or metal clay, has to be designed carefully if used for things which takes a lit of stress, like a clasp. If you make the piece sturdy it will work, but you might notice that there is a slight give in the material compared to sterling silver.
If you have any further questions or queries about how to use Metal Clay (or any of our lovely products!) please fill out the form on this page and we will aim to respond to you within 24 hours.
The Metal Clay Team
