
Here are some basic things to think of before you get started to help you get the best out of the silver clay.
Before you open your package
Art Clay is a water-based clay, so it will dry out when exposed to air. Think about your design, and make sure you have all the tools you need before you start. Keep a small pot of water and a brush next to you. If your hands are dry, moisten them with Slik, Badger Balm, Our own non stick balm or a few drops of olive oil before you start.
The secret to success is to follow the 10-80-10 rule.
1. Spend no more than 10% of your time working on the roughing out the shape of the wet clay.
2. When dry, spend 80% of your time filing, sanding, cutting and engraving the dry clay. The piece should now be more or less finished.
3. And the remaining 10% happens after firing, when you finish the piece by burnishing, sanding and polishing.
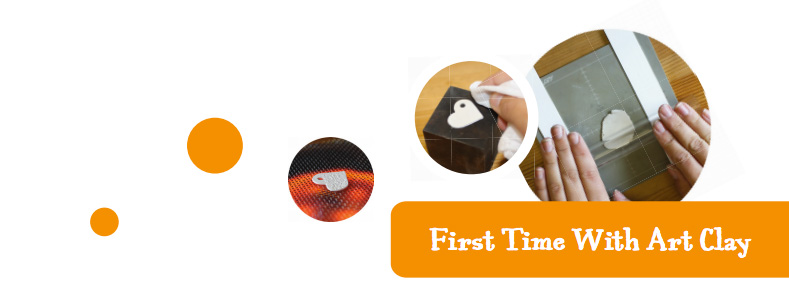
Ok, ok I'm ready to start!
Cut off as much clay as you need, and put the rest back in the little ziploc bag, wrapped up in cling film.
Put the clay you are going to use in some cling film and knead it gently for a few seconds, just to soften it a little before you start working.
If you are rolling out your clay, do so on a non stick surface. You can cover it with some baking paper or put it inside a report cover (plastic) before you start rolling. This will stop it from sticking to the roller, and will also help to keep it pliable.
If little cracks start to appear, use the tip of your finger, or a brush, to moisten it with a little drop of water or mist it with a little water and cover with a little cling-film tent, not touching the clay. If you need to leave your work briefly, cover it with a small piece of damp fabric, paper or cling film.
Use a damp finger or the brush to smooth out and moisten the clay and every now and then, if you are working with it for a long time. Don't add too much water of it might get a bit sticky. If you are are using cutters or textures, coat them slightly with cool slip, badger balm or olive oil, before use to stop them sticking to the clay.
I dropped by dry piece and it broke - what do I do?
Don't worry, if you do it well, you won't even see the repair when finished. Use Art Clay Paste to fit the pieces back together. Add a good-sized blob to ensure the two surfaces are "glued" together, and cover the surface crack with more paste. Leave to dry, smooth with sandpaper, and repeat if necessary. If it is impossible to repair, you can always use your imagination and make a new piece out fo the bits, add new clay to it to make a different shape, or use the bits as applications on another piece. You can also remoisten the clay with a bit of work. Poke holes in it, add water and wrap in double layers of cling film, leave for a day. 'Massage' the clay, if needed, poke some more holes, add more water and leave to rest. After a while you will have a lump of clay again. Or, if nothing else works, grind it up into fine powder, add a little water, and make a paste out of it.
Can I fire it now?
Are you happy with the finish of your piece? No wanted little scratches or marks in the surface? Remember that it will change into hard metal which is much more difficult to work with. Also, feel with your fingers around the piece, imagining with at it will feel like when it is metal - will there be any snags or sharp edges that you don't want there?
Make sure your piece is completely dry, If there is moisture trapped inside you might get cracks or little eruptions on the surface, or even worse, your piece might explode when you fire it. Fire the piece as per the instructions. (If using a torch or gas stove, check that the piece has shrunk about 8-10%).
But - it has turned white! What happened to the silver? You need to close the surface of the fired clay (burnish it) to bring out the silver shine. Do this with a stainless steel brush - you can use it dry, or with a little soapy water if you wish. This will give you a nice matte surface. If you want a higher shine, follow up with a metal burnisher, a tumbler, or wet and dry abrasive paper. And the final step is a good rub with a high quality metal polish and a lint free cloth. Finished!
What is Art Clay SIlver?
Art Clay Silver is a pure metal powder mixed with non-toxic binders and water. When kiln or torch fired, the binders burn away, leaving pure, 99.9% fine silver.
Art Clay Silver can be combined with a variety of media, like glass, ceramics, stones, porcelain, and polymer clay. It can be rolled, sculpted, stamped, sanded, filed, engraved, drilled and pre-polished, all prior to firing. Once fired it is pure silver and can treated like any other pure silver.
Art Clay SIlver shrinks 8-10%.
Art Clay silver includes a broad range of products, like oil paste and overlay paste, Art Clay Silver Paper and 22k Gold Clay. There is also the wonderful Accent Gold for Silver, which easily lets you add pure 24k gold accents to your silver. You can find out about the different products on your website www.metalclay.co.uk
How is Art Clay manufactured?
Art Clay is a recycled product manufactured by Aida Industries in Japan. Aida recycle and reclaims a variety of different metals, and the silver comes from many different sources, like film stock and negatives.
What are the basic steps in working with Art Clay?
Shape the clay. Leave to dry. Finish and smooth the leather hard piece with files or sandpaper. Fire. Polish, and you are ready! The piece s now pure fine silver, and can be soldered, drilled, enamelled and so on.
What is the difference between fine and sterling silver?
Fine silver is pure silver (0.999 or 99.9% pure) Sterling silver is 92.5% silver, to which is added other metals, primarily copper, as alloys. These other metals make the sterling harder and stronger than fine silver.
Does fine silver tarnish?
Fine silver will tarnish, but not as fast as sterling. The copper in sterling will cause it to tarnish more rapidly.
How can I get started with Art Clay?
You can start yourself with the help of any of the great books with step-by-step projects. These take you through the basic techniques of using and firing Art Clay. With clear photos they are easy to follow and are very inspirational. Or even better, take an Introductory Class, where you will learn the correct techniques for how to work, handle, shape and fire the clay.
How do I fire Art Clay Silver?
With a kiln, a torch, or even a gas stove. Temperature is critical as over-firing can cause the silver to melt. The firing burns out the binder, lets the water evaporate, and causes the silver particles to fuse together. A kiln is the safest method, as this ensures the right temperature has been held for the right time, and with a temperature controller, there isn't the risk of melting.
What type of kiln is best for firing Art Clay?
The SC-2 is the most popular kiln for firing Art Clay, while the SC-3 is essentially a larger version. The SC kilns are digital and very easy to program.
What about other types of kilns?
Any kiln that can accurately hold the necessary temperatures for firing will be adequate. You should test your kiln, as your kiln may have slight variations in temperature in the chamber, especially if it is a large kiln. Depending upon where you place the Art Clay in the kiln, a hot spot could cause the piece to be over fired, or a cold spot would make it under fired. Glass fusing kilns, enamelling and other computer-controlled kilns are ideal, and you can make a cone sitter do the job as well.
Can you add more to a price once it is fired?
Yes you can add more clay and re-fire it. It's amazing to see the new clay parts bond to the previously fired piece and become one sold piece. All along the way in the process you can repair a crack in a fired piece, or 'glue' two fired pieces together, use Art Clay Oil Paste for a much stronger bond.
Can I solder findings onto my piece after I have fired it?
Yes, no problem at all. Just burnish the area carefully with a metal burnisher before soldering.
